5.27. Browsing the API 
In addition to the Web interface, OnTask offers the possibility of executing certain operations through the Representational State Transfer Application Programming Interface (REST API, or simply the API). There are various elements that you need to take into account when interacting through this channel. The operations are available through various URLs. The requests need to reach the OnTask server with a previously created authentication Token. All requests need to contain this token that is checked agains the database. A token is a string of random 40 characters that is used as as secret to exchange between the sender and the OnTask server. To generate a token log into the platform, go to your profile page and click in the button Create button (or Reset if you have created a token before).
The requests for operations through the API are typically done through an external agent (another program) that wants to communicate or provide information to be incorporated into OnTask. Open the URL of the OnTask’s home page with the suffix
apidoc/
. You should see a page similar to the one shown in the figure below:
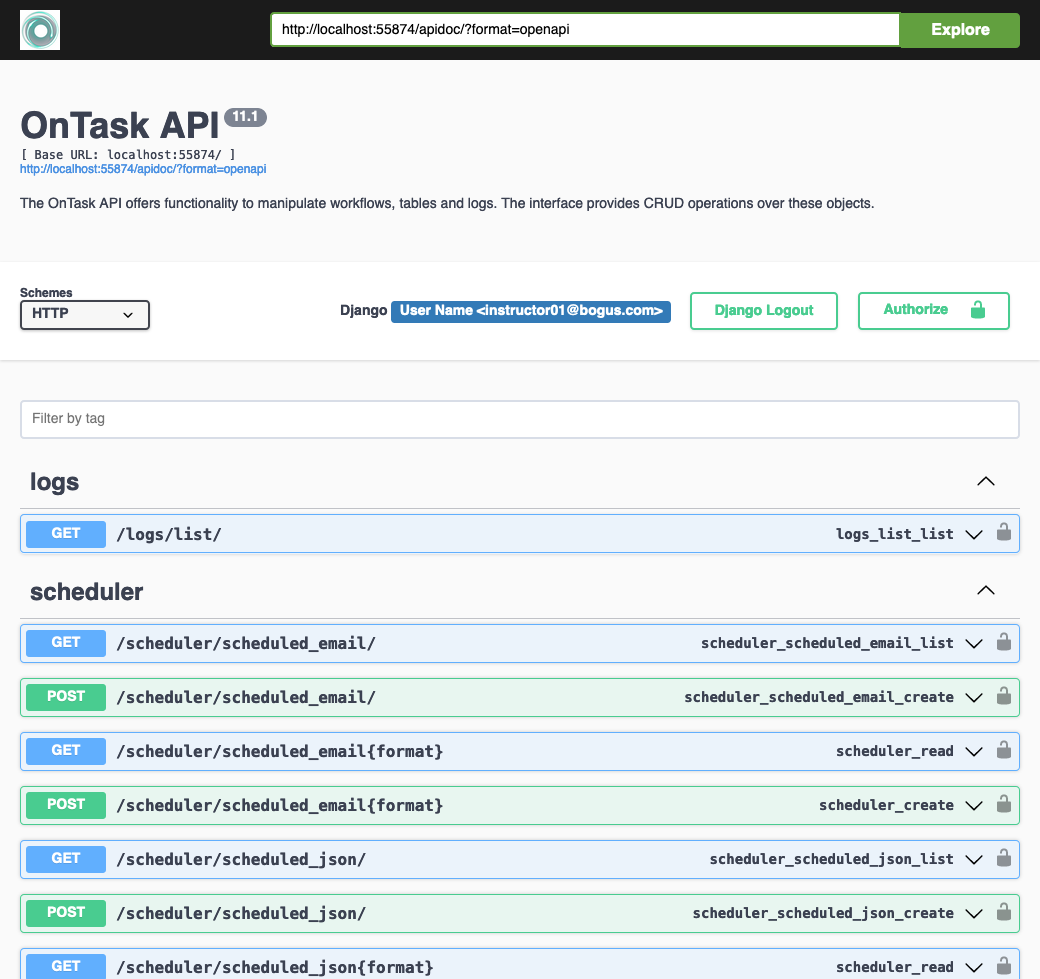
Each row provides documentation for an entry point, that is, one URL and request type. The entry points are divided into the following sections: Workflow, Table, Scheduler, Logs.
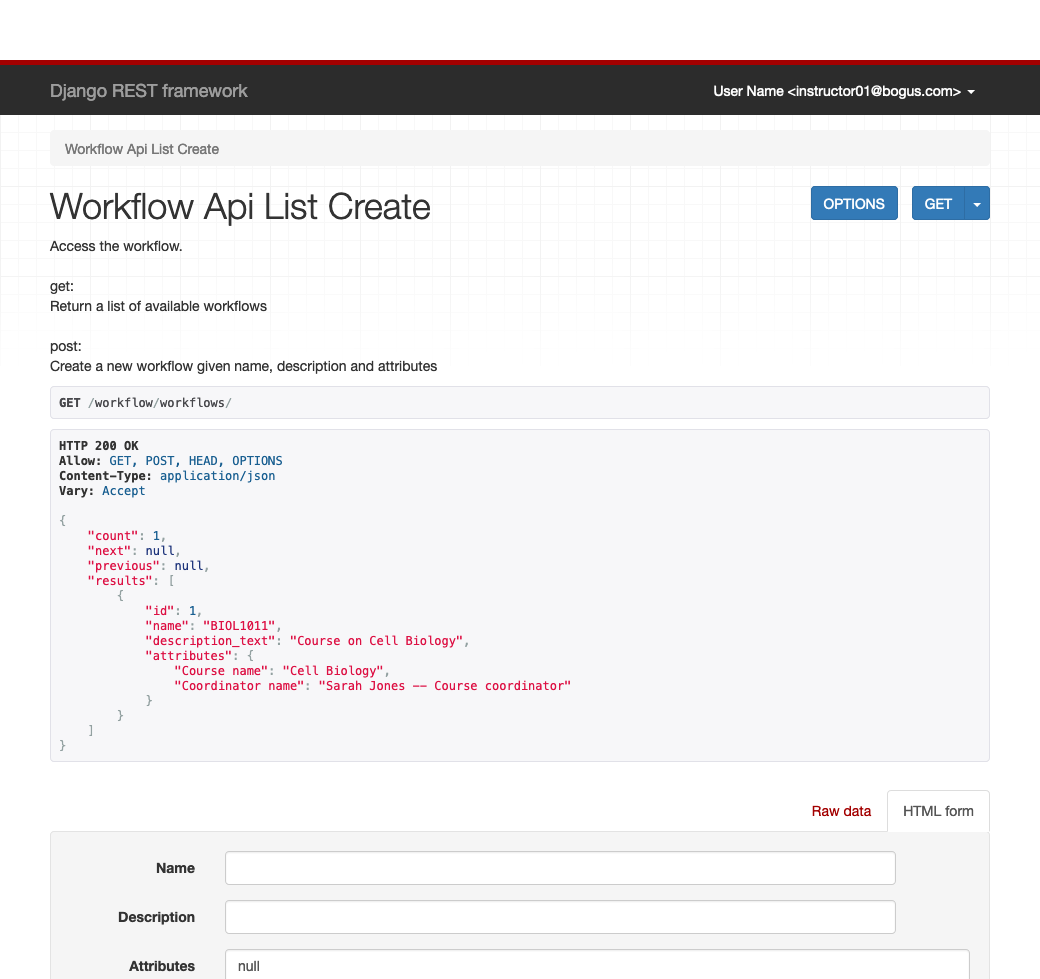
The URLs can be used by an external agent to mannipulate the data within OnnTask. However, to simplify testing, all the URLs also offer a Web interface. In other words, the operations available through the API can also be accessed through a regular browser. Open a new tab in the same browser in which you have previously opened a session in OnTask. Use the URL suffix
/workflow/workflows/
after the hostname. The platform offers the Web interface to that API as shown in the following figure.
5.27.1. Workflow API 
The entry points in this section (the URL starts with the prefix
/workflow/
) allow operations to list the workflows for a user, create new ones, change the name and description, delete, etc.
- Listing the workflows
-
Use the URL
/workflow/workflows/to see the workflows available for the given user. The screen shows the workflow id, name and description for each workflow available. - Create a new workflow
-
With the same URL, populate the form at the bottom of the screen with a name and the characters
{}in the Attributes field. Click the buttonPOST. A new workflow is created with the given name and an empty set of attributes. - Retrieve/Update/Destroy workflow
-
The manipulation to an existing workflow is done through the URL
/workflow/id/rud/whereidmust be replace by the integer corresponding to the workflow id shown by the previous ur.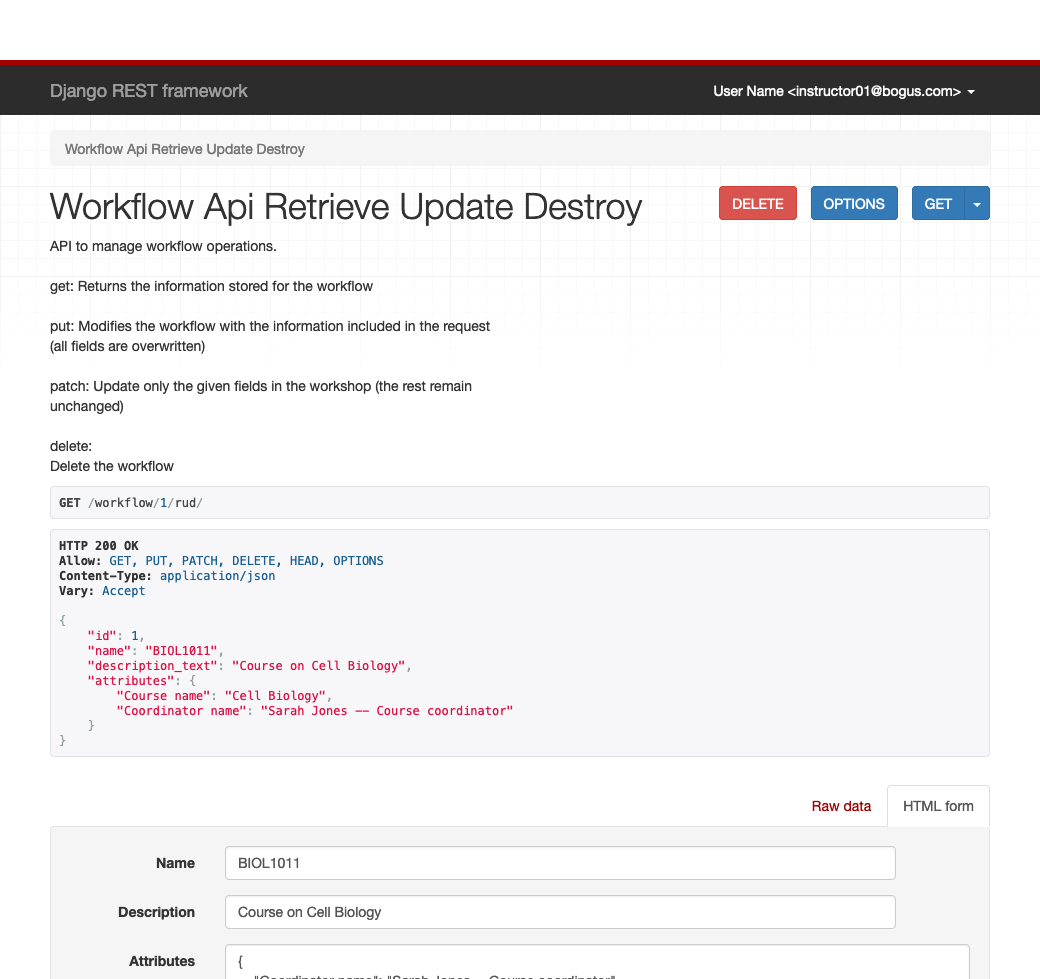
The screen shows the elements of the selected workflow and its content pre-populating the form at the bottom of the screen. Change the some of the values in the form and click the button
PUT. The workflow is modified with the new data introduced.The button
DELETEat the top of the page will delete the selected workflow (the web interface asks for confirmation, this is not the case with the true API.
5.27.2. Table API 
The second set of URLs (shown when using the URL suffix
apidoc/
) allows the manipulation of the data in the workflow tables. All operations require to provide the workflow ID as part of the URL. OnTask manipulates the data internally with a structure called
Data Frame
that is provided by the library
Pandas
that is part of the
Python
programming language. At the same time, JSON is the most widely used format to exchange data among two applications due to its simplicity. For this reason, the URLs in this section of the API use the two formats to manipulate the data: JSON or encoded Pandas Data Frames.
- Get, upload, replace and flush operations
-
Use the URL
/table/id/ops/replacingidwith the workflow identifier to access the operations to get, upload, replace and flush content of the table. The regular GET operation returns a JSON object with the current content of the table.Select the id of a workflow without a table. Type the URL
/table/id/ops/replacing the wordidby the workflow id (integer value). The new page shows the current content of the table for the selected workflow and forms to enter data through the other API methods.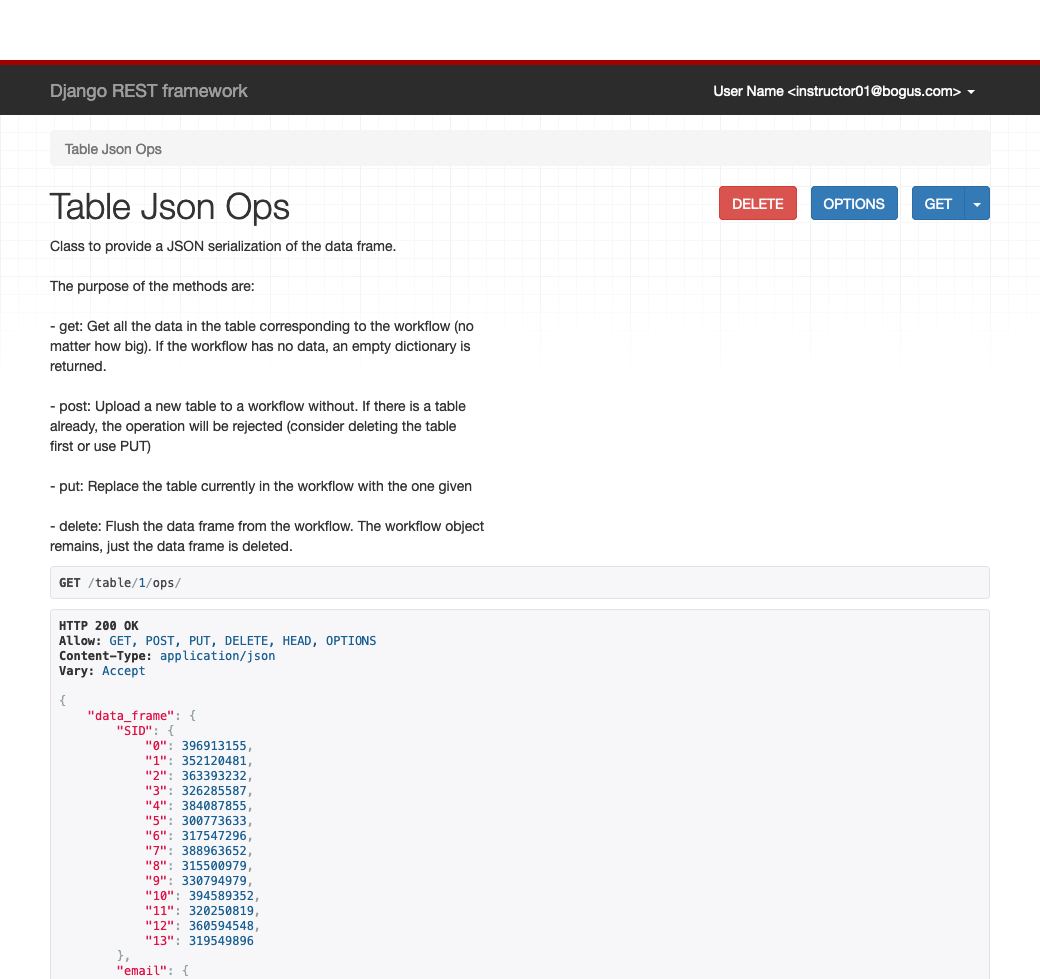
From this screen there are four possible operations:
-
Get: This is the operation that got executed when loading the page in the first instance. It returns the table in the selected workflow as a JSON object.
-
Post: Upload the table (only valid if the workflow has not table).
-
Delete: Remove the table from the workflow
-
Post: Replace the table by a new one (currently not working)
-
Following these steps to test the table manipulation through the API:
Get the current workflow table by loading the
/table/id/ops/with the appropriate workflow ID.Verify that the workflow has the correct table value (empty, or some existing table).
If the workflow has an existing table, delete it by clicking in the
Deletebutton at the top.Select the Raw tab in the bottom part of the form where the button PUT is located.
Paste the following text in the box labeled
Content(below the one with labelMedia typein the bottom form with the Raw data tab selected):{ "data_frame": { "sid": { "0": 1, "1": 2, "2": 3 }, "name": { "0": "Student One", "1": "Student Two", "2": "Student Three" } } }Click the
PUTbutton. The new table is now uploaded to the workflow.
- Merge operation
-
The merge operation assumes that there is an existing table in the workflow and a new set of data needs to be merged with it. The URL to access this operation is
/table/id/merge/(replacingidwith the corresponding workflow id).Two operations are available through this entry point: Get and Put. The Get operation (the one executing when loading the page with the browder) returns a JSON object with the current table. The operation that is relevant is the Put.
The Put operation performs the merge of the existing table with a table a given table. The operation needs the following parameters:
-
how:A string encoding the type of merge to execute. There are four possible types: inner, outer, left and right. For a more detailed explanation of these operations check the Using OnTask section of the documentation. -
left_on: The column in the existing table used to match the rows. -
right_on: The column in the new table used to match the rows. -
src_df: The new table to merge with the existing one.
-
- To try this operation follow these steps:
-
-
Load the url
/table/id/merge(replacingidwith the corresponding workflow id). -
Verify the workflow has the table created in the previous example.
-
Select the
Rawtab in the form at the bottom of the page. -
Paste the following text in the
Contentbox:{ "how": "outer", "left_on": "sid", "right_on": "sid", "src_df": { "sid": { "0": 1, "1": 4 }, "name": { "0": "Student One New Name", "1": "Student Four" }, "new column": { "0": 13, "1": 14 } } }
-
Click the
PUTbutton.
-
5.27.2.1. Why using JSON and Pandas Data Frame in the API? 
If JSON is widely used for REST APIs, why provide support for data encoded as Data Frames? The answer is due to the difference of expressive power between the two. JSON is widely used to implement REST APIs and requires a purely textual representation of the data being exchanged. The problem arises when manipulating data frames with special cases such as NaN , NaT , and similar values. These are constants used to represent invalid values in the data. JSON does not provide any direct suppor for these values. This means that either the communication does not preserve the data intact (some values are changed because they cannot be encoded), or they need to be detected and treated separatedly in both ends of the communication (sender and receiver need to implement an extra step to encode/decode these special values). The approach adopted by OnTask is to include the option of sending and receiving the Data Frames encoded using the Python serialization format pickle . The object exchanged in the communication is still a JSON object, but the data frame is internally encoded and decoded using pickle .