5.24. Download a ZIP (and upload it in Moodle) 
Log into the platform, open a workflow that contains data and a personalized action, click on the Actions link in the top menu.
The personalized text actions allow you to define a text with parts that are included/excluded depending on the value of the conditions. OnTask then allows you to send those texts as individual emails . However, you may want to extract those texts in HTML and process them with a different platform (for example Moodle). You can do this clicking in the Zip button shown in the Operations column for some of the actions.
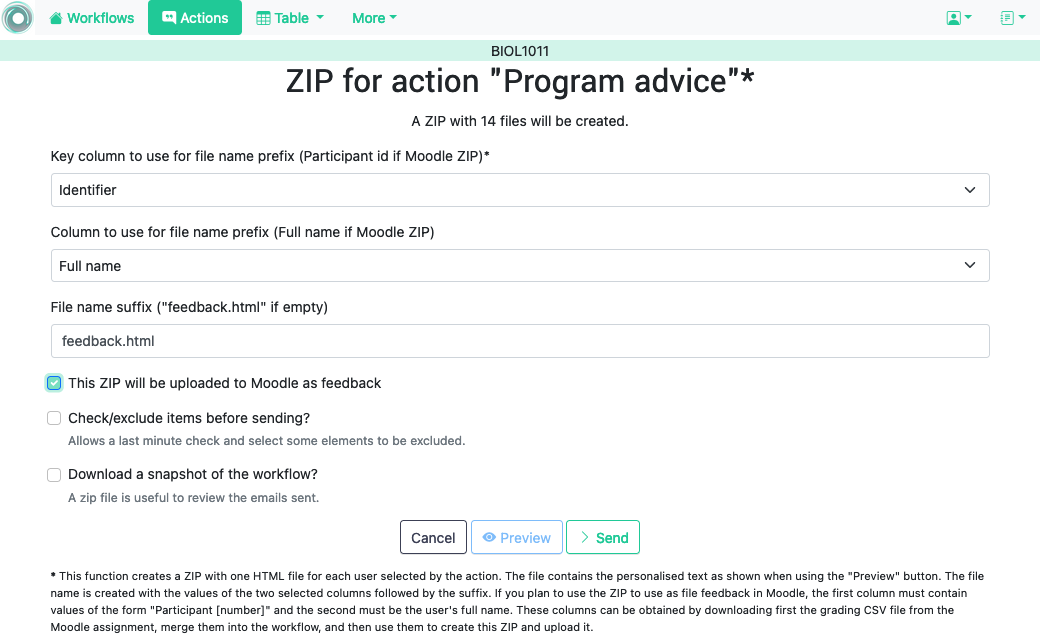
Click in this button for any of the personalized text action. The next page includes a form to collect the following information:
-
One of the key columns (unique values in all rows) to use as file name prefix.
-
Second (optional) column to use in the file name.
-
The file name suffix. If it is left empty
feedback.htmlwill be used. -
Check the next field if the ZIP is going to be used to be uploaded as Moodle feedback .
-
Check the last field if you want to review the users for which the file will be included in the ZIP (see Final look before pushing the GO button ).
Click in the button Preview at the bottom of the page to see the final appearance of the text in the file and the values of the columns used to configure the text. Click in the arrows next to the Close button to traverse the files and verify that they are properly composed.
5.24.1. Use the ZIP file to upload feedback in Moodle 
If the ZIP created using this functionality has the file names created with certain specific structure, it can be used to upload the personalized messages as part of a Moodle assignment. The workflow data table must have two columns: one with name
Identifier
with values with structure
            Participant


            N
where N is a unique number per row, and a column with name
            Full


            name
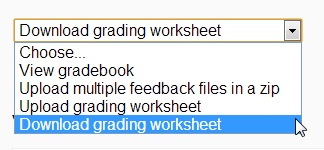
with the learner’s full name. These columns can be obtained
downloading
the
grading worksheet
from the screen showing all the submissions in a Moodle assignment.
Store the
             CSV


             file


             obtained


             from


             this


             page
. We are now going to
merge
the content of the Moodle CSV with the data already existing in the data table. In the
Actions
page, click on the link with name
Manage table data
and then in the
Upload or merge
option. Next, click on the
CSV Upload/Merge
button. Select the
             CSV


             grading


             sheet


             downloaded


             from


             Moodle
.

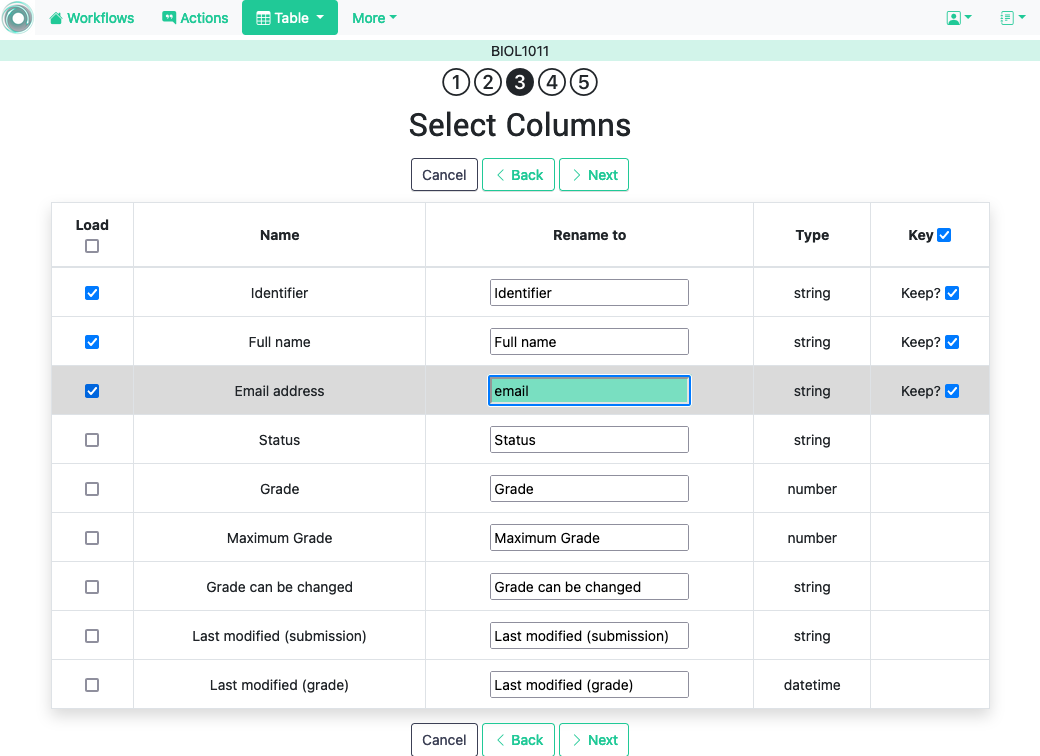
Go to the next step and select only the columns
Identifier
,
            Full


            name
and
            Email


            address
. This last one we will use as the key column to merge with the existing
email
column. In order not to create an extra column, rename
            Email


            address
to
email
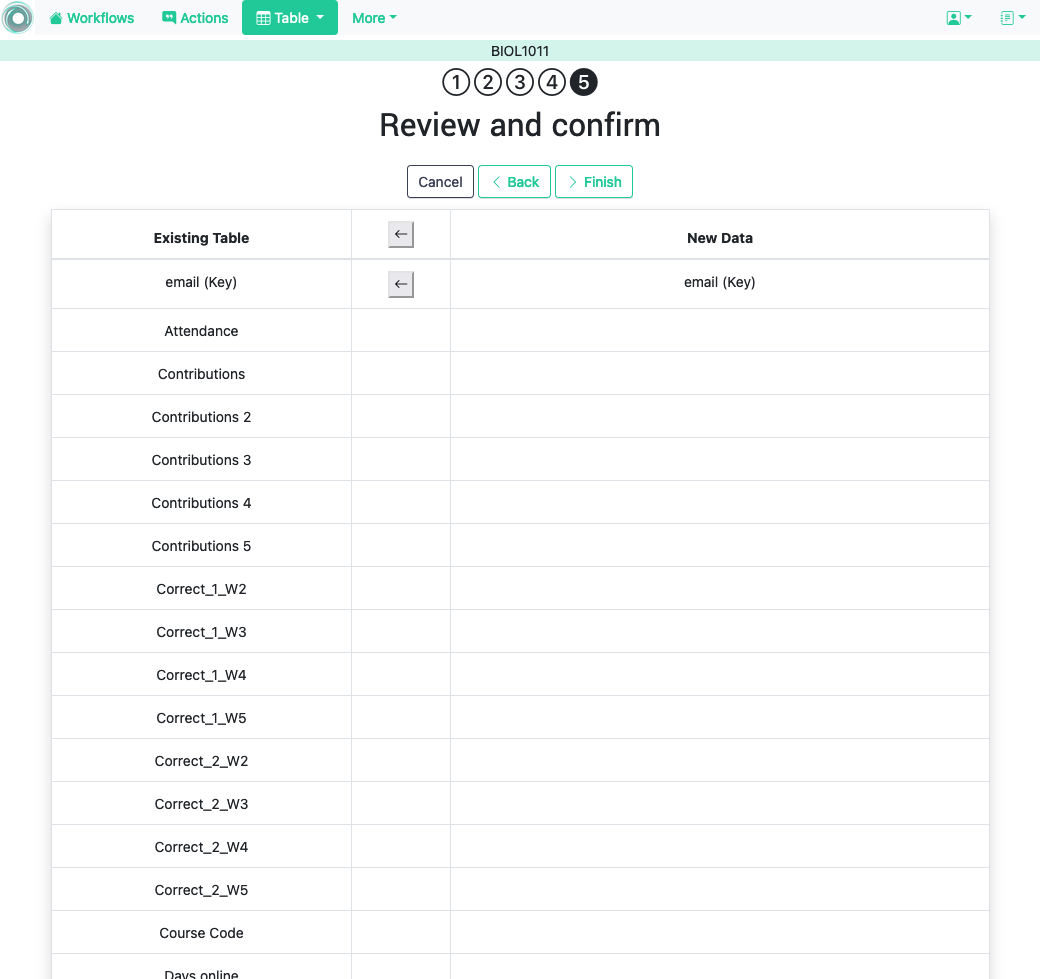
as shown in the next figure:
Select
email
as the key for the existing table and
            Email


            address
as the key column for the new table.
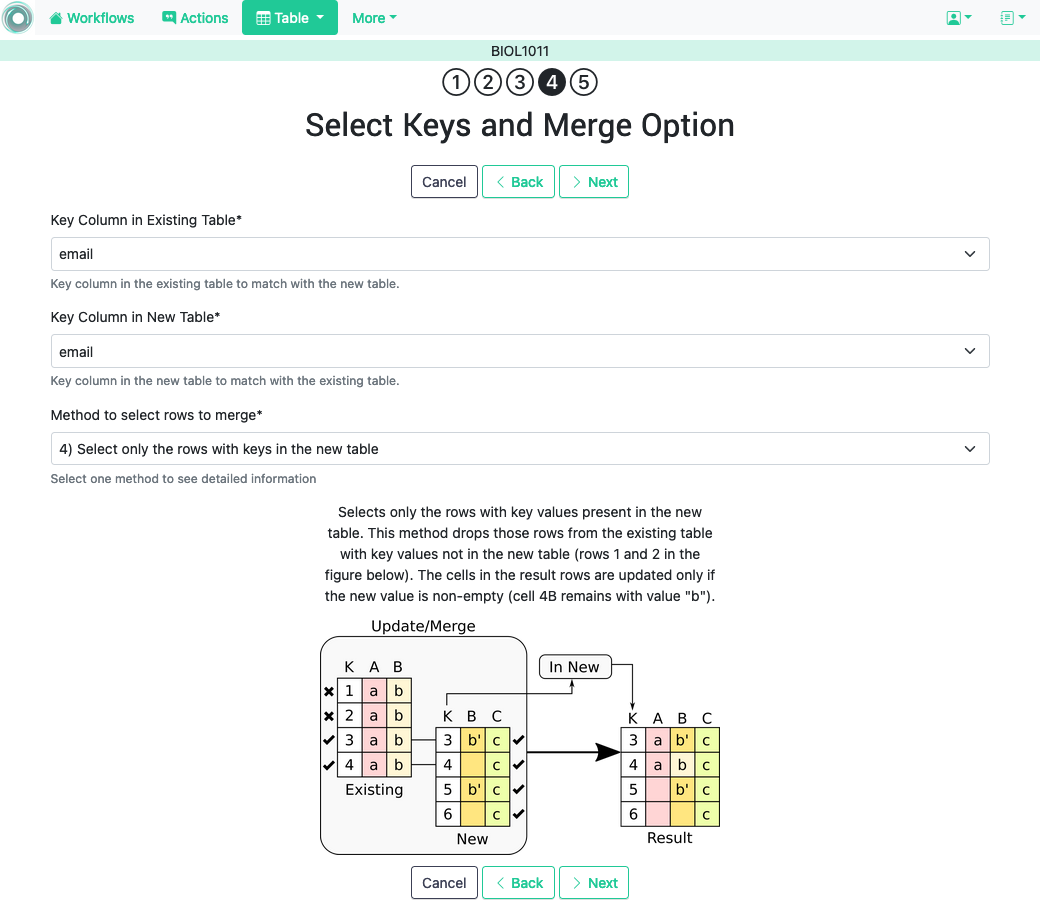
Verify that you are merging two columns and using
email
as the key.
Click finish and verify that the table in the workflow contains two additional columns:
Identifier
and
            Full


            name
. Go to the
Actions
page and click on the link to generate a ZIP file for one of the personalized text actions. Select now the column
Identifier
as the first name prefix and the column
            Full


            name
as the second column prefix. Choose additional file name suffix (or leave it empty), and
click the option for the ZIP to be uploaded to Moodle
.
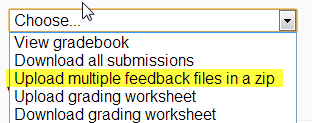
Once created, go to the page showing the submissions for an assignment in Moodle and choose the option to Upload multiple feedback files in a zip .
Upload the zip just created and each file will be placed as the feedback file for each student (independently if there is a submission or not).