5.7. Data Upload 
Log into the platform and:
-
Create a new workflow, introduce name and description or
-
Open an existing workflow without data, click on the button with name Manage table data and then in the Data Upload/Merge link.
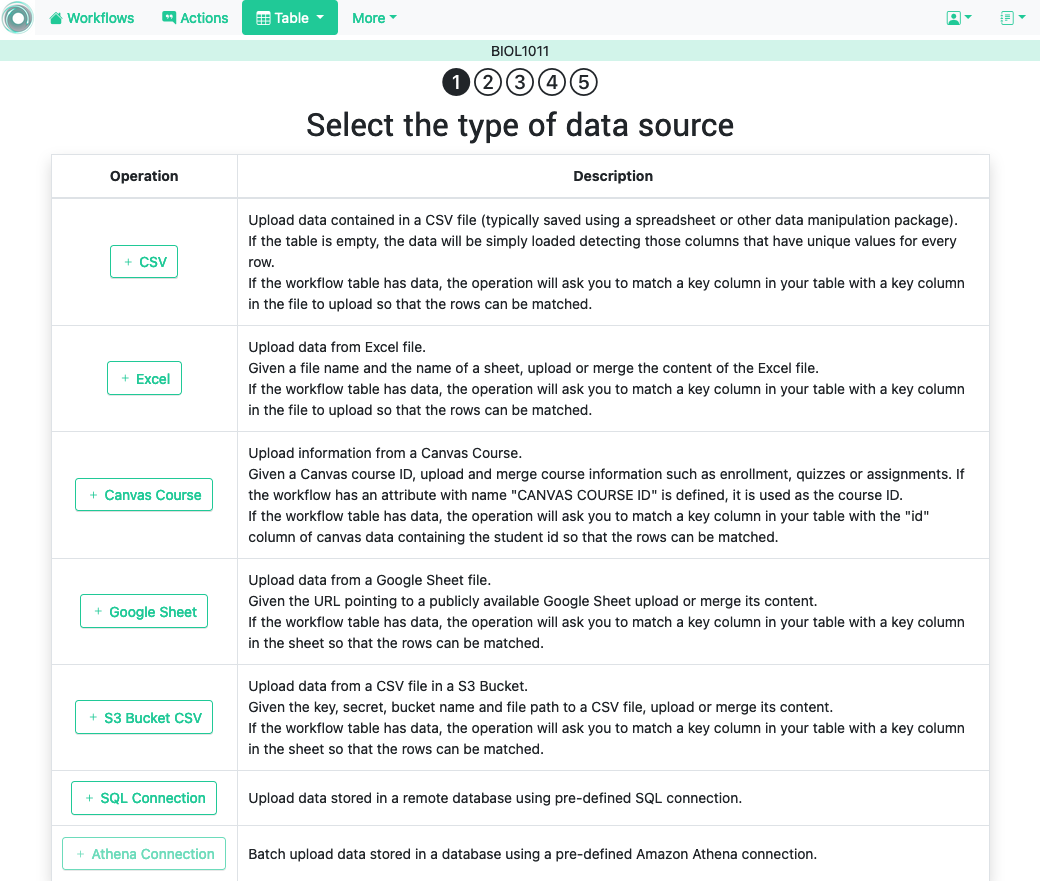
The following page allows you to upload data from several sources:
-
a CSV (comma separated values) file,
-
an Excel file,
-
a publicly available Google Sheet,
-
a CSV file stored in an Amazon S3 Bucket, or
-
a SQL connection to a relational database.
Click in the CSV button. The next screen asks you to choose a file to upload the data. A CSV file is a text file in which the data is organized by lines, and the data in each line is separated by commas. A conventional spreadsheet program can save the data in this format. When uploading the file you can optionally specify a number of lines to skip at the top or bottom of your data file. This is useful when the CSV file is produced by another tool and contains some of these lines that have to be ignored.
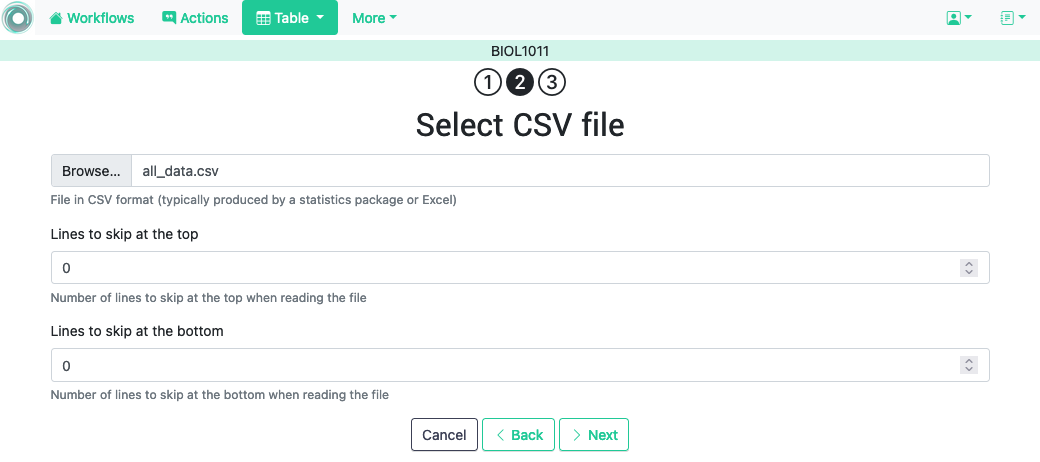
Choose the file
all_data.csv
and click on the
Next
button. The next screen shows the name of the columns detected in the file, the type of data in the column (also automatically detected), a pre-filled field with the column name (in case you want to change it), and if it is a
key column
(there are no repeated values in all the rows).
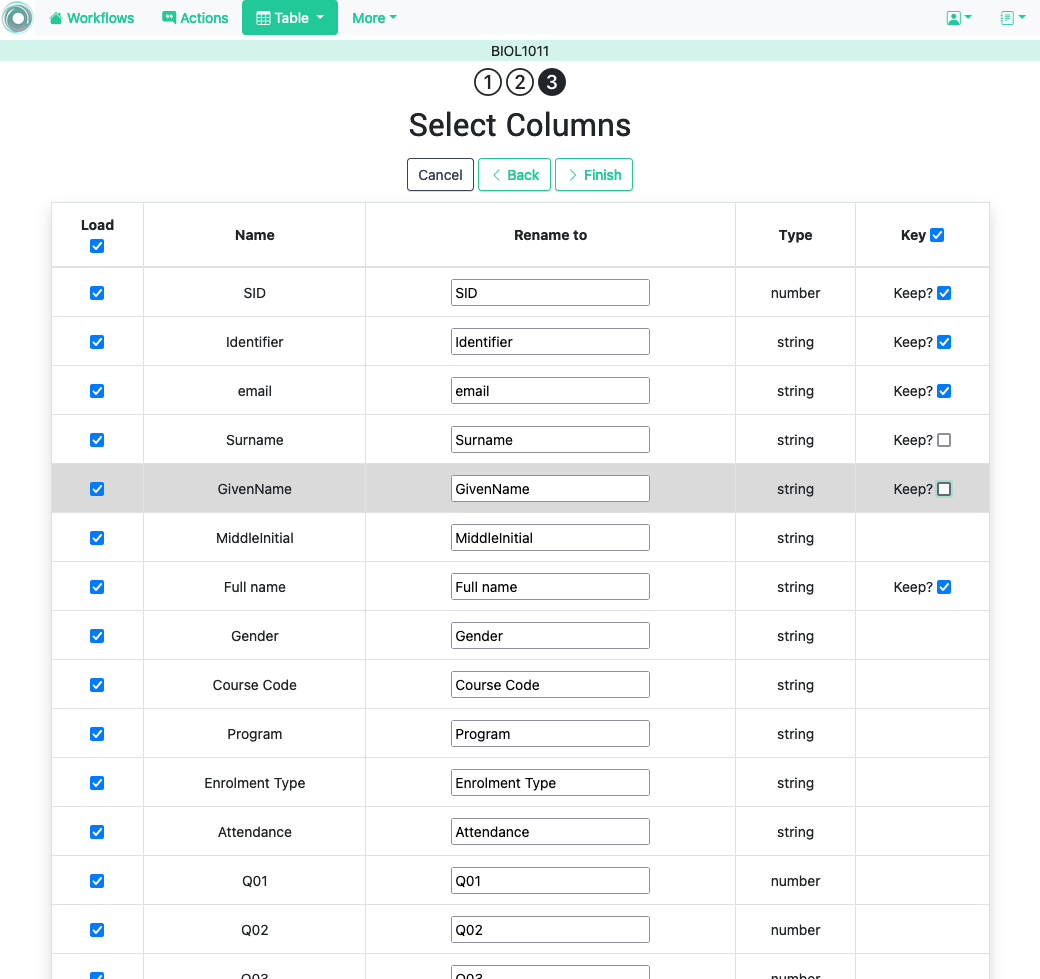
The key columns are highlighted because a workflow must have at least one column of this type. Select all the columns (clicking in the top element labeled load ) and click on the Finish button. The data in the file has now been uploaded to the table of the selected workflow.